Extractor hood over the stove in a wooden house. How to make a hood in a private house? How to make a ventilation system for a private house with your own hands. Possible ventilation problems
Reading time ≈ 13 minutes
Older people often say that our homes are becoming more and more like aquariums, and this trend is constantly progressing. We are replacing wooden windows with plastic sets, and wooden entrance doors with tight-fitting metal sheets, but such progress has both positive and negative sides.
The desire for such a replacement is quite understandable - the house becomes warmer, since plastic and double metal do not allow air flow from the street, and besides, it is excellent sound insulation, which is important in an age of rapid technical growth. It is quite natural that in such a situation (after all the changes in housing) the question arises of how to make a hood in a private house with your own hands and, of course, most homeowners want to arrange an exit through the wall - this is more convenient and cheaper than through the ceiling.
The most uncomplicated hood made through the wall
What are hoods
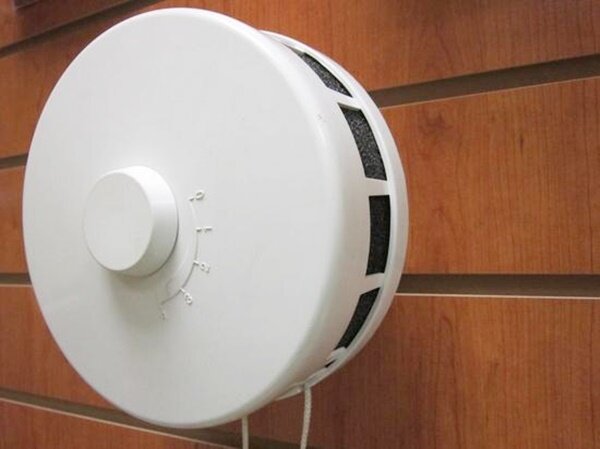
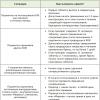
Mechanical supply and exhaust valve
In this case, we are talking about the hood, since ventilation can be not only exhaust, but also supply. However, both will be affected:
- Natural ventilation. The possibility of natural ventilation is in every house or apartment - these are open windows and doors. And in the old fund with wooden frames, these are gaps at the vents and sashes and a poor fit of the door panels to the frames.
- A two-sided louvered grating can be inserted into the wall, which can be adjusted as desired, making the gap larger or smaller. Such factors allow the air to move arbitrarily, in accordance with the difference in temperature, pressure or wind. But this is the main drawback of natural circulation - it is completely dependent on atmospheric phenomena.
- In addition, a mechanical supply and exhaust valve or a double-sided grill with a fan can be inserted into the wall, which acts as a pump, pumping air in one or two directions.
- The main advantage of natural hoods is the possibility of installing such valves in any room of the house, the wall of which borders the street. Since we are talking about a private house, such devices are rarely included in the project - they are made during the operation of housing, as needed.
- Since the channels for natural ventilation are ineffective, they are equipped with exhaust fans. In private homes, such devices are mounted in bathrooms and kitchens, in home workshops and pantries. In most cases, this is enough to clear the air of unpleasant odors and fumes.
In order to correctly calculate the power of the hood, you will have to take into account several factors, and first of all, this is the volume (not area) of the room, since with the same quadrature of the room, the difference in the amount of air contained there can be very different. For example, a kitchen 2.5 × 3 m with a ceiling height of 2.5 m holds 2.5 * 3 * 2.5 = 18.75 m3, but if you raise the ceilings by only half a meter, you get 2.5 * 3 * 3 = 22.5 m3 of air. As you can see, the difference is significant and if in the first case a ø 100 mm hole is enough, then for the second option it is advisable to use a 150 mm channel. But if, for example, the kitchen has 30 m3, then it is better to make two holes of 100 mm each than one ø 200 mm - the effectiveness of this approach has been tested in practice, especially since either one or two units can be used at the same time.
You should also take into account the physical properties of air flows - warm ones always rise up, dragging steam along with unpleasant odors. For this reason, exhaust devices are always mounted under the ceiling, even if there is a fan there (in the duct). In addition, some modern systems have additional equipment for the engine, which reacts to the level of humidity in the room and, when the required indicator is reached, they simply turn off the power supply, and turn it on again when the humidity rises. But in view of the high cost of such equipment, it is not popular in the residential sector - it is much more convenient and more profitable to use split air supply systems.
In boiler rooms and semi-basements

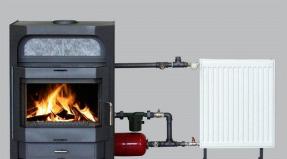
Ventilation system in the boiler room of a private house
In the upper image you see a diagram of the ventilation system in the boiler room of a private house - it is a supply and exhaust system, because if you simply pump out air, but do not allow inflow from the street, this will prevent diesel, gas and solid fuel boilers from burning. An outlet in the wall, as a rule, is most conveniently equipped here with a fan, which can be started using a thermal relay. That is, you do not need to purchase expensive and, moreover, rare automatic control equipment - the start-up interrupter through a heat relay is easy to design and install with your own hands. But, be that as it may, in addition to the forced wall hood in the boiler room, there must be an opening window or transom.
When building a house with a basement floor, at least two air ducts are provided in advance, which are made in the wall under the ceiling - these are actually stationary wall exhaust devices for natural circulation. If necessary, in such rooms, electric fans are installed in the ducts, and all wiring is packed in linear or corrugated cable channels - this is very convenient and aesthetically pleasing. The same method can be applied to kitchens or bathrooms if the wiring was not installed during the construction or renovation of facilities.
Wall ventilation schemes

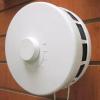
Exhaust valve with fan (top left) for wall ventilation
In fact, there are three types of devices for exhaust ventilation:
- With natural draft (due to temperature and pressure differences).
- With forced outflow using a fan impeller (the most popular).
- Combined option - the hood can operate in two modes.
Installation work in the kitchen

120mm kitchen hood opening
Now let's figure out how to make a kitchen hood in a private house with your own hands, using the exit through the wall, however, as is done in most cases. Let's start with the diameter. It is best to connect a 100 mm metal corrugation to the working umbrella, but not PVC pipes, which are rigid and it is too difficult to make a smooth transition from vertical to horizontal. In addition, it is not always possible to make an outlet exactly opposite the umbrella nozzle, and there may be various reasons for this - unwillingness to violate the architecture of the facade, a pipe running along the wall, or any other obstacles.

Flange for fastening the corrugation
But a hole in the wall should be made with a hole cutter (pobedite or diamond) ø 120 mm - now I will explain why such a discrepancy in diameter is needed. The corrugation itself is put on a flange, which is previously screwed over a hole made in the wall, and the metal hose does not even go inside with its edge. But after drilling, no matter what the wall is made of, it will crumble - not much, but quite enough so that this dust can enter the kitchen in the wind and this should be prevented immediately. Therefore, a PVC casing pipe with an inner ø 100 mm and an outer ø 110 mm is inserted there - it enters freely, but if there is a socket, then the last centimeters have to be hammered through the board with a hammer so as not to break the PVC.

The hole in the wall is not always opposite the umbrella nozzle
Before installing the corrugation on the hood, it is necessary to calculate its length, and for this you will have to determine the height of the umbrella above the gas or electric stove. Generally speaking, this is about 70-75 cm, although this parameter should be determined independently, and one should start from the convenience of the hostess at the hob, I personally take this into account when I make such settings. We have about 50-70% of women, and men too (or better, we will say families), are engaged in home canning of fruits and vegetables.
In order to conserve 4-re three-liter bottles in one go, you will need a large 40-liter pan (four-bucket), and now let's estimate the dimensions. The height of the pan is 35 cm, the height of a standard bottle is 24 cm, in total, 35 + 24 = 59 cm. But in order to pull the jar out of the pan with your hand, you need at least 10 cm more distance can), therefore, 59 + 10 = 69 cm and this is back to back. That is why I say that the distance between the hob and the umbrella should be at least 70-75 cm.

Attaching the hood to the wall
The exhaust hood can be fixed in two ways - either to the wall, or it can be mounted in a wall cabinet of a kitchen set, even if air is removed through the roof. But there is one more nuance here: if the hood is installed in one of the cabinets of the kitchen set, then it is connected inside these cabinets, and ≈220V is connected to the common terminal of the upper part of the kitchen set and from there the lighting is connected above the tables and, possibly, additional sockets. Such installation is convenient in that absolutely all wiring, switches and sockets are hidden.
But there are options when the umbrella is inserted into the closet, but there are no built-in lights in the upper part of the headset, therefore, an independent installation of the outlet is required here. If the socket is hidden in a cabinet, it is very convenient to install it - the surface-mounted socket itself is screwed to the wall or ceiling of the cabinet and connected from a ≈220V wire coming from the wall or descending from the ceiling. But if there are no wall cabinets at all, then you have to make a hole for the socket with a hole cutter, and again bring a ≈220V wire coming out of the wall or descending from the ceiling to it. But here it is best to place the outlet above the umbrella so that it is possible to disguise not only the outlet, but also the power cord with a plug.

Check valve on the ventilation grille
Now let's move on to the outside of the hole. There will be a small gap between the pipe and the wall, which is best blown out with mounting foam, although if desired, it can be plastered to stiffen the channel. In any case, the pipe should not protrude beyond the wall, but if this happens, then it is easy to cut it with a hacksaw blade. Only it is better to use not steel (it will immediately burst from bending, but pressed - it is a little more expensive, but they last about twice as long).
As for the ventilation grill on the street side, it can be rectangular, square, round, oval, but it is best if it has a check valve, as shown in the top photo. These are non-adjustable movable blinds, which are lowered at rest and close the grate, therefore, snow or rain that the wind blows cannot penetrate inside. But when the exhaust fan is started, the shutters are lifted, freeing the passage for the air flow.
Video: Master class on installing the hood in the kitchen
Exhaust ventilation in the bathroom and toilet

Drilling a hole and inserting a casing
In fact, the installation of an exhaust hood is very similar to the same work in the kitchen, but this only applies to the device of the hole itself through the wall and, perhaps, the power supply ≈220V. As I said, the diameter of the hole depends on the volume of the room, and the fan power can be calculated using the method described above. Suppose you will make an insert from a hundredth pipe, but again you will have to make a hole in the wall ø 120 mm, that is, the casing pipe will have a gap from the wall, which is later blown out with mounting foam.

Wall fan installation
Connecting an electric fan can be done in several ways, and one of them is provided by the manufacturer, this is a remote switch in the form of a hanging cord, colloquially referred to as "lazy". Another way is to connect the fan start to the switch - turn on the light in the bathroom or toilet, and the fan starts. And finally, the third way, which is often combined with lighting - a microswitch is installed in the door, and when it is opened, the circuit closes, but there is one inconvenience here - when closing, the circuit opens again and the fan turns off along with the lighting, so I think that this to nothing, although some still install.
Conclusion
Now you already know how to make a hood in a private house with your own hands. In technical terms, the issue is not so complicated, especially if an exit through the wall is provided. The most important thing is to have a puncher, tape measure and level, as well as a good eye. And further. If you are not friendly with electricity, then ask someone for help in connecting the unit so as not to accidentally burn the engine.
The ventilation duct in a private house is the only way to get fresh air in a living space. The air supply must be constant so that every member of the family can stay healthy. Creating ventilation is easy, but choosing one of the options is not easy. The scheme of the house will help in this matter, because the future hood will depend on the building itself. And it will provide residents of the house with protection from mold, fungi, dampness.
Types of ventilation in a private house
Installation of ventilation in a private house will become an integral part of the building. Experts in the construction business say that it is this work that requires a lot of effort. In a private house, you can create two options for exhaust systems:
- exhaust ventilation;
- supply and exhaust.
Exhaust ventilation will allow the air inside the room to freely flow outside with the help of forced intervention, and fresh air will enter through the channels in a natural way.
The supply and exhaust scheme implies a forced discharge and inflow of fresh air into the house. This scheme is much more difficult to implement, the prices for the elements are more expensive, and therefore it is rarely used in the construction of small private houses.
In turn, each of the proposed ventilation systems can be divided into centralized exhaust and decentralized. In the first case, a special ventilation unit is used. It helps circulate the air in the room. The second option involves the location of several units throughout the system. Each of them works independently of the others and is installed in every room of the house.
Natural ventilation and its disadvantages
In a private house, there may be such a system as natural ventilation. It is not always possible to create it with your own hands in a full-fledged form. This question arose sharply when most people began to use plastic windows and wall insulation. The situation gave birth numerous problems- increased dampness, the formation of fungus and mold in the house. Such problems did not arise when old windows were used, because they let fresh air through the cracks. The draft also created the necessary conditions to reduce dampness in the corners of a private house.
In such a ventilation system, the principle of operation of vertical channels is used. They are mounted indoors at one end, and the other is displayed just above the roof of the house. Since the air in the room is warmer than the one around the room, it is pushed into the exhaust duct and contributes to the intake of a new portion of air from the outside. This ventilation system implies many factors that are beyond human control - ambient temperature, wind, and the cross section of the channel can be made with the desired diameter with your own hands.
If you turn to construction specialists, they claim that such a ventilation system of a private house will work only when the temperature of the external space is equal to no higher than 12 degrees on the Celsius scale. If it gets hotter, then the hood starts to work much worse.
This situation may seem ideal for the winter season, but here, too, there is a special drawback that cannot be ignored. Since the temperature difference in the house and outside is quite noticeable, the ventilation system starts to work faster. The heat that has accumulated in the house during the day literally flies out into the chimney. Therefore, residents of private houses spend more resources on heating their premises than normal conditions require.
The ventilation scheme of a private house involves the creation of such channels in the bathrooms. Often, such hoods can be seen in the kitchen, basement and a number of other rooms where it is necessary to make a large outflow of air from the room. Particular attention should be paid to the premises that are located in a private house below ground level. They often produce radon gas. To reduce its number, it is recommended to build powerful ventilation duct.
The same experts say that sometimes these measures are not enough. In this case, the rationality of the system is completely lost. This is used by people who can open the window at any time, create a strong air flow in the premises and quickly ventilate the house. Only one nuance is lost - such a ventilation system is unacceptable, as it puts all residents of the room at risk of illness.
As a result, there are significant drawbacks - ventilation in a private house of this type implies uncontrolled air flows, and also does not allow regulating the outflow and inflow.
Options for improving natural ventilation
 You can always improve the effect of natural ventilation in a private house, even with your own hands. For this purpose it is necessary use a special valve. It is customary to mount it at the entrance to the channel located indoors. This device is equipped with automation that reacts to humidity. If an increase in the indicator is observed in the room, then the automatic relay is activated and the valve opens the channel more. Otherwise, it closes. The sensitive element is a sensor that is mounted outside the house and receives a signal from the ambient temperature.
When the cold season comes, the valve must be covered with your own hands. This nuance will reduce the ingress of cold air into the house through the ventilation duct. Unfortunately, even this control option is not able to hide all the shortcomings of the natural ventilation system.
Forced ventilation it is also installed in a private house using another existing method. This option will be much cheaper than the previous one, but it will take more effort to maintain it. It implies the installation of special grilles with valves on the air inflow and outflow channels. Moreover, the latter are controlled exclusively by hand. Adjustment is carried out when the ambient temperature changes. It is recommended to change the position of the ventilation valve at least once a season.
The last option to improve the natural ventilation system is the installation of special fans on the channels. The similarity of such an exhaust system can be observed in the kitchen. The only downside is what happens destabilization of the entire ventilation system. In other words, air may begin to come from a duct in a pantry or back room.
Forced ventilation in a private house
 This ventilation option can only be considered when a sufficient amount of fresh air enters a private house. The disadvantage of the hood is the problem of its dismantling, which may be needed for a variety of reasons.
A secondary problem is the decrease in channel performance. At this point, there is a decrease in circulation. The room is left without the necessary amount of fresh air. It is recommended to install such ventilation in the basement or basement, where the risk of dampness is much higher than in other parts of a private residential building. As experience shows, there are no problems with the installation and adjustment of the correct outflow and inflow of air. This procedure can be done by hand in a short period of time.
Do not forget that the hood scheme may also imply presence of fans. These devices are able to regulate the flow of fresh air. Any owner can install them with his own hands.
Supply ventilation in the house
One of the problems of a private house is the lack of fresh air. Therefore, its supply should be forcibly established. You can achieve the desired result using a special device called supply valve. In addition to the main function, it is able to give:
- minimization of noise from the outside world that enters a private house;
- air filtration;
- thermal insulation of the body, which reduces the likelihood of freezing, as well as the creation of condensate;
- You can manually control the operation of the device.
Each ventilation duct for the home will require additional installation of this device. In extreme cases, you can get by with one valve, provided that centralized ventilation is available.
The functioning of the valve depends on the temperature difference between the room and the outside world. During the period of forced exhaust operation, the adjustment is carried out in manual mode.
Supply and exhaust scheme with heat exchanger installation
 If a supply and exhaust ventilation scheme is used in a private house, improve her performance can be done by mounting the heat exchanger. With the help of the device, the air supplied to the premises is heated. The principle of operation lies in heating the air through the one that is removed from the house. However, the system does not mix them. In the summer season, you can install a reverse process in the house. The air entering through the forced ventilation duct can be cooled.
This technique deservedly leads among the most diverse options for hoods around the world. According to the expert, the future is fixed for this scheme, which allows you to manage energy-saving technologies. The cost of this system is high. If you constantly use it, then after a short period of time it will fully pay for the costs.
Creating ventilation in a private house with your own hands
The time has come when all the elements of the ventilation puzzle in a private house are collected. Selected specific exhaust system, the material has been purchased and it remains only to correctly install all the elements. The first step is to understand what calculations should be made before installing ventilation. One of them is the calculation of the required amount of fresh air. This parameter will be needed when installing channels, as well as when choosing additional equipment.
Calculation of ventilation by area of the house
This calculation is carried out in order to obtain accurate data on air exchange. It is necessary to take into account all the nuances that may affect the result:

The choice of duct section for a private house
When it becomes necessary to select the diameter of the ventilation duct, the following system applies:
- the minimum indicator of the channel diameter should not be lower than 150 millimeters;
- under ideal conditions (vertical installation of the channel, length 3 meters), this diameter allows you to get 30 cubic meters of air per hour;
- when it is necessary to increase the air flow, the length and cross section of the selected channel increases;
- on the same floor of the house, the length of the exhaust channels should be the same. In this way, you can achieve a uniform distribution of air throughout the house;
- the diameter of the ventilation ducts, for the convenience of mounting the ventilation system, is set the same.
Ventilation system in a wooden private house
The peculiarity of creating a hood in wooden houses is that the material independently passes air into the room. That is why such buildings are recommended additionally seal. This is served by plastic windows, the installation of special heaters, and a film impervious to wind. That is why it is necessary to install a special ventilation duct, since the natural process of fresh air inflow is significantly reduced.
True, civil servants stand in the way of such decisions: a homeowner can make holes in the walls only upon agreement by the housing inspection, which will require to bring both the layout and the alteration project developed by a certified organization, etc.

One of the readers of our portal bypassed this burden in an elementary way: he made an air duct from the kitchen hood through the window. I replaced the glass with plexiglass plates, in these plates I made a hole for a plastic tube, with a diameter like that of a corrugated hose. I inserted a fan from the cooler into one (inner) end of the tube, and attached a spring-loaded exhaust valve door to the opposite end. Then he put a corrugated hose on this tube and secured it with clamps. It turned out, perhaps, not too aesthetically pleasing, but cheap and elegant.
For those who have read the previous part of the note, it will not be a problem to install a purchased kitchen hood with your own hands. The rules are the same: the hood is placed in the center of the stove, the distance from the lower edge of the hood to the hob is at least 65 cm; the electrical part must be grounded.

If you still don’t dare to do the installation of a kitchen hood with your own hands, then keep in mind that kitchen hood installation price hands of invited experts in Moscow is not so small:
- installation of a hood of the "Peak" type - 1350 rubles;
- built-in hood - 1500 rubles;
- domed - 1800 rubles. and higher depending on the width;
- "Island" hood - up to 4500 rubles.
Do-it-yourself kitchen hood repair
If you have familiarized yourself with the device of a kitchen hood, then you probably already understood that only a fan can really break in it. If you are not a master from a fan factory, then simply unscrew it and take it to a service center: they will fix it or sell you a new one.

The two main kitchen hood repairs that you have to do yourself are replacing the filter and cleaning the hood.
Filters must be changed regularly. The frequency of different manufacturers is different - for some - two weeks, for others - two months. Some companies equip their products with filters, on which, as they get dirty, some kind of inscription disappears or appears. Like: "Wash me."
The article will become your guide when purchasing tiles for the kitchen
There are two types - coal and grease. Coal do not wash, and do not change. They are removed, disassembled, old granules are poured out of them and new ones are filled in.
Grease filters are divided into two subspecies:
- which are thrown out and replaced;
- and which are removed and washed.

Wash filters according to instructions. Usually either in soapy water or using a prescribed detergent.
Hoods should also be cleaned regularly. We do not want to scare the reader, but the greasy soot deposited on the walls of this device tends to ignite.

Many modern hoods are equipped with bulbs that illuminate the stove. When burned out, they can be replaced with your own hands just like any ordinary lamp. But if a touch control device or a remote switch breaks down on such a hood, then you will definitely have to call the service center specialists.

It seems that all possible options for breaking kitchen hoods are listed. It remains to add that cracks, gaps, if they appear, must be covered with a heat-resistant sealant.
Installing a kitchen hood: video see here:
Connection do-it-yourself kitchen hood, video see here:
Modern equipment speeds up and facilitates the cooking process, and makes it much more comfortable. The hood in a private house and city apartment has long been an important element of the technical equipment of the kitchen: it protects the entire home from food odors, and the kitchen itself from grease and soot deposited on the walls, ceiling and furniture. The installation of this device is not particularly difficult even for a beginner, and even an experienced owner, who is used to equipping a private house with his own hands, can do it at all.
In order for the hood in the kitchen in a private house to cope with the load and work efficiently, it is important to consider not only the size and appearance of the device, but also its technical capabilities. Therefore, carefully read the parameters that will be useful when choosing a particular model.
The hood in a modern kitchen can be a highlight of the interior
- Extraction performance - the volume of air cleaned per hour. It is calculated simply: the volume of the kitchen (area by height) is multiplied by 12 (air exchange rate), the resulting number is again multiplied by 1.3 (minimum stock coefficient).

The formula for calculating the minimum performance of the hood
- Dimensions. The air intake area should be at least (and ideally a few centimeters more) than the working surface of the stove.
- Noise level. Usually this parameter is indicated for each model separately, it remains only to correlate the units of measurement with your own feelings.
On a note! 20 decibels emit rustling pages, 25-35 are comparable to a loud whisper or ticking of a wall pendulum, we take 50 dB during a normal conversation, 80-90 is the noise from a passing motorcycle or a switched on hair dryer, 110 is the work of a puncher or drill, but at 130 dB and above comes the pain limit.
- Operating modes. In modern hoods, two principles are combined - the removal of polluted air into the ventilation system and its filtration (recirculation) with its subsequent return to the room.

The principle of operation of flow-through and circulating kitchen hoods
- Lighting and instrument control. They choose according to their own taste and wallet - there are models with protruding buttons, with a touch panel, with automatic on / off (of course, the more technical "stuffing", the more expensive the device). But even the simplest device copes with the main purpose of the hood - the removal of smoke and burning.
- Hood design. In addition to high-quality air purification, it is important that the device fits into the interior of the kitchen and harmonizes with other appliances.

Inclined hood sensor model with high-tech design
In addition to the listed characteristics, one more important point should be taken into account: if power outages and power surges are frequent in the house, buy a device with a built-in or separately connected fuse.
Important! When buying a recirculation model, please note that the power of the device should be 30% higher than that of a standard hood, because the device not only draws, but also recycles air. You will also have to take care of the timely (at least twice a year) replacement of filters. But such a hood has a global advantage: it can be installed in a house where access to the ventilation duct is difficult.

Varieties of hoods - appearance and technical characteristics
Today's home appliance market offers us three main models of hoods. After studying the information about them, it will be possible to decide which hood in the kitchen in a private house will be the most effective.
Flat (classic) suspended hood

Suspended hood can be hidden in a wall cabinet
The main mode of operation is recirculation. It is recommended for small kitchens, as it is the least powerful and simply cannot cope with large volumes of air. An additional disadvantage is the constant (and expensive, moreover) replacement of filters - coal or acrylic. But this design does not need to install an additional air duct and can be attached directly to the kitchen cabinet.
Built-in hood

Built-in models are easy to hide
The device is freely placed in a hanging cabinet, only an air inlet remains below, most often equipped with an additional retractable panel. Due to this, it is ideally camouflaged and can fit into any interior, but an additional installation of an air duct is required, which can be led into the finished ventilation through a wall or roof. The device itself is not much more powerful than the previous version, but it does a better job of removing smoke and odors due to the forced emission of polluted air to the outside.
Dome or fireplace hood

Dome appliances look stylish and modern
The most powerful and modern models. They do not need to be disguised, on the contrary, their design can become a real decoration of the kitchen. They are used at any location of the plate - in the corner, against the wall or in the middle (island version). The classic outlet of the duct is up to the roof, although you can arrange an exhaust hood in a private house and through the wall.
Important! With a significant size of the kitchen and the presence of additional appliances for heating or cooking, it is necessary to use a really powerful hood. This is especially true for private houses, where, in addition to the stove and oven, there is also a gas / solid fuel boiler in the room.
Installing a built-in hood in the kitchen
Let us consider in detail the installation of a built-in appliance - the most common model that fits almost any type of room. To equip the hood in a private house with your own hands, the installation scheme involves several stages.
Preparatory work
Proper preparation for the installation of the hood is the most crucial stage, which takes the most time.
- We choose a place for the hood, focusing on the location of the plate and the dimensions of the device case.
- We make markings on the wall for fasteners, be sure to use a level. When installing above a gas stove, we place the air intake panel at a height of 75-85 cm, for an electric hob, the distance can be reduced to 65-75 cm.
- Focusing on the markup, we punch holes and drive dowels into them.
- To install the hood in a kitchen cabinet, it is necessary to cut a hole in it for the body (usually the bottom or part of it is removed) and for the air outlet pipe on the back side or roof.
- We calculate the route of the air duct from the hood to the ventilation outlet. We take into account that the length of the pipe should not exceed 3 m, and we try to make the number of its bends minimal.
Important! Each 90 degree pipe turn reduces ventilation performance by at least 10%.
- We buy the equipment necessary for air removal, as the hood is sold without it. The most affordable are now considered plastic pipes (round or flat) or a metallized flexible sleeve - corrugation. A not too experienced installer will be more comfortable with the last option - it has fewer swivel joints. True, in the open form, the corrugation is not very aesthetic, so you should think about buying a decorative box with which you can close it.

Built-in air duct fits easily inside a regular cabinet
- We prepare the ventilation outlet. When connecting to an existing ventilation system, we simply remove the protective grille and insert a corrugation or pipe inside. If in a wooden house the hood to the kitchen is installed with an outlet to the street through a wall or ceiling, you need to drill a hole of the required diameter under the duct (at least 120 mm). In a building made of bricks or gas blocks, such a withdrawal will be more difficult, since there is a high risk of damaging the masonry, so it is better to stop at the option with a ventilation duct.


Scheme of output of the external ventilation hole
- We install an anti-return valve that will not allow the exhaust air to return back to the room. Outside, the hole is closed with a ventilation grill.

- We equip the connection to the power supply. It is better to place the socket behind the hood body or duct pipe, and it must be grounded.
The most difficult stage is completed, the next is the installation of the hood body.
Installing the hood body
For a built-in hood, you just need to fix the case (or a cabinet with the appliance box installed in it) to the kitchen wall. To do this, we use a pair of self-tapping screws, twisted into prepared dowels. So that the hood body does not resonate during operation, you can glue it to the cabinet with liquid nails. If there are shelves inside the furniture, you need to make holes for the air duct on each of them. And now you can proceed to laying a drain for polluted air.

To correctly make holes in the cabinet, the main thing is to know the diameter of the duct pipe
Air duct installation
We carry out the air duct pipe to the installation site of the hood housing above the gas stove. Depending on the materials chosen, this process can take place in different ways.
- In the case of arranging a drain from plastic pipes, you need to carefully select all the elements - the pipes themselves, swivel corners and adapters for connecting to the vent and the hood outlet. Remember that the diameter of the duct must be the same along its entire length, since contractions and expansions can unbalance the operation of the entire system. By the way, if the length of the pipe is more than a meter, it is worth taking care of additional fasteners. After complete assembly, all joints must be treated with sealant.

The plastic air duct is easily masked
- When choosing corrugations as an air duct pipe, the work is much less. It is only necessary to fix the ends of the sleeve to the ventilation outlet and the hood with reinforced tape, providing sufficient tension to reduce resistance. However, if you want to keep the interior of the kitchen in a single design solution, the corrugation must also be disguised. For example, you can lay it behind the kitchen cabinets, which is very inconvenient. It is easier to sheathe with decorative panels or buy a ready-made box for communications.

Corrugated air duct - easy to mount, harder to hide
It remains only to check the performance of the fully assembled system, for this we plug the device into a power outlet and press the "start" button.
How to make a duct box
If the vent is at a significant distance from the stove, the corrugation laid through the half-kitchen will disrupt the entire design of the room. And a flat plastic duct, which is so easy to decorate to match the color of walls or cabinets, may not be able to cope in a large room where a powerful hood is required.
Of course, there are exceptions - these are high-tech loft-style kitchens, where corrugations, pipes, wires and other communications become a thematic addition to the interior. If the room is not decorated in an urban spirit, it does not need such decorations. And the simplest and most effective way to decorate will be to cover the space between the upper cabinets and the ceiling with drywall.
Important! Moisture-resistant drywall is best suited for the kitchen, and ideally with fire retardant impregnation.
Work algorithm:
- On the ceiling, markings are made for a metal profile frame. The lines are beaten off with the help of a level, the edge of the cabinets serves as a guide - the future box must completely repeat all the bends of the working wall. And the design itself can be located either on the same level with the cabinets (it turns out a perfect disguise if you choose the color of the drywall finish to match the furniture), or protrude above their surface to achieve the effect of a two-level ceiling.

Box made under a two-level ceiling
- The profile is cut into the desired fragments, attached to the ceiling and shelves using dowels / self-tapping screws.
- The structure is reinforced with vertical posts every 80-100 cm.
- Then drywall sheets are cut out, and the frame is sheathed around the perimeter with self-tapping screws in increments of 30 mm (and they must be screwed in so that the caps are recessed into the material by 0.5-1 mm). Opposite the vent, you need to make an inspection hatch so that, if necessary, you do not disassemble the entire structure. For this section, drywall is cut exactly to size, but is not attached to self-tapping screws (you can point-fix the panel with sealant, and then remove it with a construction suction cup or install small doors).
- Now it remains to process the traces of the fasteners and the joints of the sheets with putty to level the surface and decorate with a finish suitable for the interior. It can be wallpaper, tile, PVC film or other suitable material.

Plasterboard frame for hood
On a note! In the protruding box, you can additionally build in spot lighting - this looks beautiful and will be a convenient help for the hostess, because there is not much light in the kitchen.

Illuminated air duct box - effective and functional
Rules for installing the hood:
Now you know how to properly make a hood in a private house and solve the issue of decorating it. As you can see, the main points of installation are not particularly difficult and do not take much time. But it’s far from always possible to cope with the preparation on your own, especially when it comes to the hood in the wall in a private house. Therefore, to drill an external hole, you will have to rent special equipment or invite professionals who will do everything quickly, cleanly and efficiently.
To reduce the noise level caused by the vibration of the pipe, I advise you to wrap it with batting.
Production of a box and a pipe of an air cleaner
After organizing the duct, you can begin to manufacture the frame of the drywall duct for the hood. The shape of the air cleaner can be varied, but most often hand-made devices are made in a domed shape. This is done in the following way.
A box is made from a metal profile. Its dimensions should be such that it slightly exceeds the diameter of the corrugated pipe used as an air duct. The box is attached to the ceiling of the kitchen.

The lower frame for the exhaust device is made from the starting profile and fixed to the wall of the room. After that, parts of the frame are cut out of the profile, which subsequently connect the lower base to the box.
The side surfaces of the dome for the hood are equipped with additional jumpers to increase the rigidity of the structure.
The drywall frame is ready. Now you should cut a hole in the duct for the output of the corrugation. The final stage in the formation of a home-made hood is the sheathing of the constructed frames with drywall.
Air cleaner trim
The preparatory operations are completed, and you can start finishing work.

After sheathing the structure with drywall sheets, the corners are reinforced with perforated corners. After that, the dome for the hood without a fan is puttied. At this stage, drywall joints and fasteners are hidden.
After the preparatory work, you can begin to implement any design ideas in the process of decorative finishing of the hood. The product is covered with paint, varnish, decorated with painting or decorative stones.
Active plywood hood
For the organization of an active exhaust system, the central element is the engine, thanks to which the air will be sucked into the duct. Making a homemade exhaust fan is quite difficult, this requires knowledge in this topic. Therefore, to collect a homemade hood for the kitchen, it is worth taking an old device that is in working order as a basis. If there is none, the solution will be to purchase an inexpensive model that is suitable in terms of performance and size.

The manufacture of an active type kitchen hood begins with the assembly of the body. To begin with, the lower frame is assembled, on which the engine and exhaust grille are installed. Further, the main elements of the frame are made, which are attached to the base. A homemade kitchen hood can be of any desired shape, so the components are made depending on personal preferences. It is important to consider one point here: an air duct pipe must be placed inside the frame.
Details for finishing the air cleaner are made from. Further, they are sequentially glued to the frame. After the glue has completely dried, the plywood surface is sanded and puttied.
 The hood should be as useful as possible
The final stage in the manufacture of a decorative hood for an active type kitchen is the process of its artistic design. Depending on preferences, the air cleaner can be painted, varnished or lined with other materials.
WATCH VIDEO
The finished device must be connected to the ventilation system of the building. To do this, the air cleaner is mounted using fasteners, after which an air duct is connected to it. If necessary, it can also be hidden in a decorative box.
Adhering to the above recommendations, making a hood in the kitchen in an apartment or a private house is no more difficult than attaching the purchased device. In addition, this option will allow you to make a product that matches the style and character of the interior. Now you know how to make a hood in the kitchen.
Read also...
- Maps of the Simbirsk province Old maps of the Simbirsk province by Schubert
- We clean coins at home: with soap, Coca-Cola, citric acid, electrolysis method
- Detailed map of the Oryol region with villages, cities, towns and districts Schubert's map of the Oryol province 1850
- What are the signs advised to do if you find a cross