Snowman pencil drawings different poses. How to draw a snowman with a pencil step by step. How to draw a snowman from Frozen with a pencil step by step
Returning to the drawings from the cycle « Getting ready for drawing competitions on the theme "Winter fun for children" » .
Drawings about winter fun are included in any kindergarten program for fine arts, and the same picture in elementary school. You should be aware that the themes are complex, involving multi-figured compositions with movement and interaction of characters. And this despite the fact that we explain the idea of \u200b\u200bthe location of the figures relative to the horizon line and the laws of perspective in a glimpse and incomprehensibly for kids, and they only know about the structure of the human figure that “the body is oval”. However, drawing competitions on winter themes are held regularly, you must participate.
So we are getting ready.
Today we are making a snowman.
In student drawings, children usually, standing up to their full height, easily roll huge snowballs in front of them. Or, again, standing with a pillar, they decorate the face of a tall snowman with carrots.
This winter, walking around the city, I looked out for snowmen everywhere - there are few of them. And the few short-lived Snowmenons I had a glimpse of were all NOT: they didn't wear buckets on their heads, they didn't have carrots, they didn't have caries-looking coal teeth, they weren't equipped with brooms.
I want to say that the conventional image of a snowman has long lost its relevance. The current snowmen are decorated minimalistically. And there are very few of them. Snowmen are difficult to sculpt - packed snow is heavy and even just rolling snowballs is already very difficult.
But we NEED drawings of children building a snowman. Well well. This theme is the human figure.
How do they make this snowman? We look on the Internet - many children are on their knees. Of course - yard snowmen are usually short people.
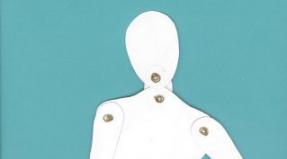
I choose this picture and build a diagram of the figure of the child:
The girl is on her knees with her back to us. And if it were necessary to turn it to face us, then the snowman would block it. So on so. The pose is not very difficult: the back is straightened, the head is slightly tilted. She is on her knees and, note, her knees are not close, the left one is pushed forward. The feet are at a right angle to the lower leg - of course, the shoes are hard, you can’t pull the toe off. Both arms are bent at the elbows and extended forward. Gloved palms are pressed against the snowman. What I ask the students to pay attention to is that the child is dressed in winter and looks impressive. The arms and legs in overalls are quite massive. There is a hood, it lies in folds on the neck and shoulders.

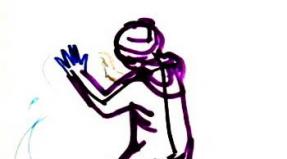
Nearby we see another figure - a child collects snow in a handful. He stands on half-bent legs and strongly bending over stretches his hands to the ground.

Children usually draw a leaning person in the shape of the letter G. And when I say that you need to take care of balance, and that the center of gravity of the figure is approximately in the solar plexus region, and the perpendicular drawn from it should pass between the feet, the children listen to this whole conversation like Chinese. Of course, in order to really understand this, one must be interested in it. If difficult topics have to be passed (run through) forcibly and in a deafening stream of other complex and uninteresting subjects, then the chances are that the idea of balance, not supported by a dozen other sketches FROM NATURE, is unlikely to find a response.

But drawing competitions on the topic of winter fun for children have not been canceled, we are preparing further. By the way, here is another version of this pose - kneeling:

How to draw children make a snowman 2
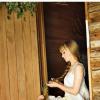
Here is a photo - a girl almost squatting down, holding a medium-sized clod of snow.

I note that even of this size this lump is probably heavy for her. In the photo, the child's shins are hidden in deep snow, but we will draw them. The figure is turned to the viewer in three quarters. The body is tilted, the left leg is foreshortened and fairly shortened.
Vera Zhigailova
Abstract GCD for fine arts - drawing:
Topic « snowman» .
Target: To develop the artistic and creative abilities of children.
Learning tasks - to exercise children in drawing round objects;
To teach to convey in the drawing the structure of an object consisting of several parts;
- to consolidate the skill of painting circles with continuous lines from top to bottom or from left to right with the entire bristle of the brush:
Educational tasks - to make children desire draw funny snowmen:
Cultivate empathy, accuracy in working with gouache.
materials: Tinted paper; gouache paint, water cans, brushes, napkins. An easel with a blank sheet of paper. Finished drawing with the image snowman.
preliminary work:
Examining illustrations with an image snowmen;
Modeling, application snowmen;
Knowledge of geometric shapes (circle, size;
Knowledge of the seasons.
Course progress.
The teacher invites the children to stand in a circle and play a game:
Hello Friend! (give another hand)
Get in a circle
Hello bunny! (raise one hand up)
Hello hedgehog! (raise other hand)
What a good day! (raise both hands)
Hello squirrel! (raise one hand up)
Wolf, hello! (raise other hand)
Hello, sounds like an answer (put hands in front of you)
Hello Friend! (give one hand,
Hello Friend! (give another hand)
Get in a circle
We will go around in circles and find friends for ourselves.
Guys, and you and I will go through the forest and meet another snowman, and what is his name you will know if you guess riddles:
1. Red nose in the hands of a panicle.
Lives next to the tree.
Get used to the cold
Our cheerful... (snowman)
2. In the yard stands with a whisk.
Befriends our kids
Smiling slyly
Instead of a hat - there is a bucket!
(snowman)
The children answer snowman.
caregiver: Right! These are the guys snowman. (shows drawing snowman) And what time of the year can we sculpt snowman?
Children: Winter
caregiver: We sculpted on a walk snowman. What does it look like snowman?
Children: Yes snowman looks like a pyramid, roly-poly.
caregiver: Guys, do you remember how we sculpted snowman?
Children: Show with hands a circle in a circular motion.
caregiver: Guys, how many circles do you need to make it beautiful and big snowman?
Children: Three.
caregiver: Were the circles the same size or different?
Children: Different. Big, smaller and even smaller.
caregiver: And what circle was at the bottom big or small?
Children: Large at the bottom, then smaller, then small.
caregiver: What color snowman?
Children: White.
caregiver: On a tinted sheet of paper attached to the board, draws a large circle at the bottom of the sheet with white paint. Children, how do we paint over snowman what lines, show in the air.
Children: In the air, they show movements from top to bottom or from left to right.
caregiver: (drawing asks all three circles) What is missing in our snowman?
Children: Eye, nose, mouth, hat, broom.
caregiver: We can do all this finish drawing paints of a different color.
Now you can draw the cutest snowman!
But in order to draw a snowmanwe need to play snowballs:
Fizminutka.
One two three four, (count fingers)
We made snow with you (making snow)
Round, strong, even, smooth, (show circle with hands)
But not at all sweet (threaten finger)
Once - toss (toss)
Two - catch (we catch)
Three - jump and break. (jump up)

caregiver: And now we can draw, but for this we do not forget to wet the brushes, remove excess water on the edge of the jar, remove excess paint on a napkin, and rinse the brushes well when changing the color of the paint.
At the end of the lesson, we hold an exhibition of works.


Related publications:
"It's snowing." Synopsis of GCD on fine arts (drawing) in the first junior group. Motivation: Snowfall outside the window. Tasks:.
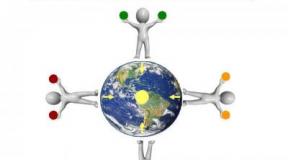
Theme: Drawing with soap foam. "Colour the Planet" Purpose: To introduce children to the new technology of fine art.
Purpose: To introduce children to the wonderful world of art Tasks: To continue to teach children to use different visual media for.
Abstract of the OOD on visual activity in the senior group "Drawing a self-portrait" Program tasks: -Introduce children to non-traditional technique - "drawing with cosmetics"; -Teach children to draw a self-portrait in this technique;
Abstract of the lesson on visual activity (drawing on fabric) "Spring" Program content: Continue to teach children to draw specific images, compose compositions, carefully use a brush and paint, use.
Winter is on the street! Building time and the guys and I decided to draw snowmen. Walking on the street, the children and I played with the snow, examined it.
Summary of a lesson in finger painting in the younger group “Leaves are falling” Purpose: to learn to draw with fingers (dip a finger in the paint and make an imprint); continue to acquaint children with the phenomenon of nature - leaf fall;
Abstract of the lesson on visual activity in the first junior group. Drawing with paints "Legs walked" Purpose: Rhythmically apply strokes horizontally on the sheet. Notice their position on the strip. Use the brush correctly. Preliminary work:.
Snowman is a mandatory attribute of the New Year holiday. Which of the kids has not sculpted this wonderful snowman in the yard of his house! Three large round balls of snow, of different sizes, stacked on top of each other. There is a bucket on the head, a carrot sticks out instead of a nose. These are the signs that distinguish a snowman. Let's now gradually move on to the New Year theme in the drawings, because this favorite holiday is just around the corner.
Stage 1. We draw with you the torso of our snowman. A large circle is at the bottom, a medium-sized one in the center, and the smallest one at the top. These are three sections of the torso of a frosty little man.

Stage 2. On the upper circle we depict a headdress - a bucket. In shape, it looks like a rectangle with a concave bottom. Closer to the edge of the circle, draw a nose - a carrot in the shape of a cone. Our snowman seems to be looking to the side.

Stage 3. Now we draw an eye of a snowman. Then from the bottom of the bucket, where the hole is located, we make a handle screwed onto the screws. The pen falls on the snowman's face.

Stage 4. It's time for the hands of the snowman. These are simple sticks with twigs at the ends. The branches resemble, as it were, splayed fingers. We draw the branches so that they look up and to the sides. All this is depicted by straight lines.

Stage 5. We decorate the snowman's hat - a bucket - with a flower. How to draw a flower - you all know and know how, we are sure. Draw two circles on the middle section of the body. These will be the buttons. Let's imagine that our snowman is dressed in certain clothes and it is fastened with these buttons.

Stage 6. Let's start coloring our frosty snowman. This option is easy to implement.

But what to do if there is a desire, but there is no possibility - the cold, frost and a caring mother do not allow.
Don't despair! Pustunchik will help you arrange a real winter holiday without even leaving the room. We can’t blind, then we’ll draw.
How to draw a snowman?
In order for the drawing to come out correct and beautiful, you need to know what main parts the Snowman consists of.
Usually these are three snowballs: the largest is the Snowman's abdomen, the smaller one is his chest, and the smallest is his head. Snowman arms and legs can also be made from small snowballs. Often two small branches are attached to the place of the hands. The nose is usually made from carrots, and the eyes and mouth are made from coals. And, of course, an invariable attribute - a bucket, instead of a hat, and a broom, which he "holds" in his hands.
Now you can start drawing, and to make it easier for you, use the tips in the form of diagrams. They have a variety of snowmen on them!
Scheme 1
Scheme 2

Scheme 3

All children, regardless of age, are waiting for a warm winter with fluffy snow. Someone to go sledding, and someone to make a beautiful snowman with a broom and a carrot instead of a nose. The only pity is that the snowman can quickly melt and only a pile of snow, or even a puddle, will remain of him. A snowman painted with gouache will not melt and disappear, but will remain for a long time as a memory of a snowy winter and a fun pastime. Our new master class will show how to draw a snowman in stages and I must say, it's simple, which means that even a small artist can do it.
- paints;
- brush;
- pencil;
- container for water;
- landscape sheet.
Stages of drawing a snowman with gouache:


5. With black gouache we direct the eyes-embers. The snowballs themselves are partially painted over with blue paint to show the volume. On the hat and scarf, we draw with white paint small dots-snowflakes that seem to fall from fluffy clouds onto a snowman. Funny snowman is ready. Looking at him, I want to put on warm mittens and, as in childhood, make such a snowman. 
We have drawn a snowman. BUT
Read also...
- The history of the invention and development of watches The history of the transformation of watches
- Why does a person move and what are convulsions?
- How to decorate the room in an original way for the holiday: do-it-yourself birthday posters
- What are synonyms and antonyms in Russian What are called antonyms give examples