A selection of programs for creating a bootable flash drive. We create a bootable USB flash drive using the Multiboot USB program Download the program for installing Windows on a USB flash drive
I recently wrote an article on how to create a multiboot flash drive. I think it makes no sense to write about this a second time, just follow the link and you will see an effective way, believe me.
Now I will tell you how to make a multiboot drive with several systems and completely different programs, most likely the article will turn out to be large, but it doesn’t matter, because all the effective options will be in one place.
How to create a multiboot flash drive using WinToHDD
An interesting program in which, in addition to creating bootable flash drives, there are also functions for copying the system and installing a new one. So that users understand how to use it, I will try to describe everything in a simple and understandable language.
Before the process, you should move important files from the drive to another location, such as a hard drive.
You can download WinToHDD from here. Run the utility and click on the "Multi-Installation USB" section.
A window will open where you need to select a flash drive from the drop-down menu. A message will pop up about formatting the flash drive, be sure to transfer important data. Next, select the system and boot partitions, although there is only one flash drive, so they will be the same. We click on the "Next" button.

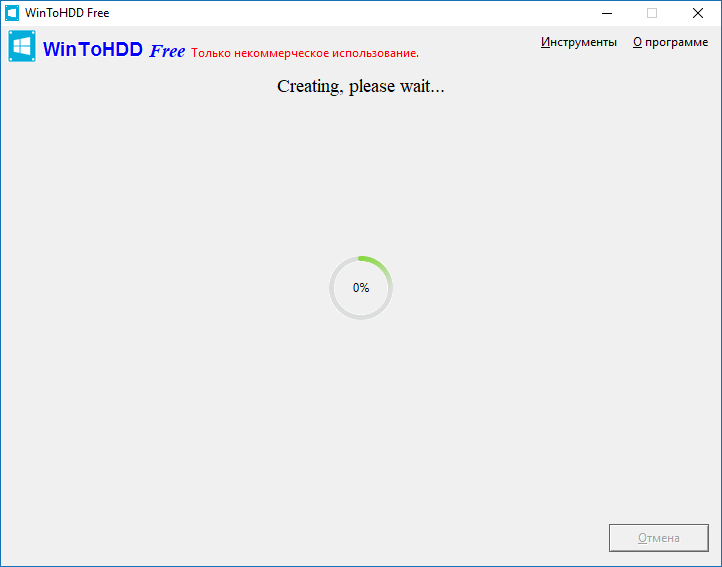
The recording of files on the USB flash drive related to the bootloader begins, an important operation in which it is better not to touch anything, but just wait.
What do you think should be done now? I hope you have already prepared images of operating systems. They need to be moved to a USB drive. Everything, a multiboot flash drive was made.

What to do with a flash drive made in WinToHDD
We have created a bootable flash drive with several operating systems, which is very pleasing. Now you should boot from it. This can be done through the BIOS or Boot Menu, whichever is convenient for you.
A boot manager appears, where you select one of the presented items - 64-bit system or 32-bit.

The WinToHDD utility window will appear with the name of the system image. Let's start a new installation and select the desired system from the list. Now click Next.
Next, we are offered to select or create the following partitions - boot and system. Here you should be a more experienced user and not mess up anything. If necessary, convert partitions to MBR or GPT.

If your BIOS is not UEFI, but the boot type is Legacy, then you should convert the partitions to MBR, and also format it to NTFS.
If you are using a UEFI BIOS, then we will convert the partition to GPT. All this is done on the command line.
Once you have specified the necessary partitions, you can click the "Next" button and wait for the system to install. You can experiment on a PC with this program, if this instruction seemed a little complicated to you, but we managed to create a multiboot flash drive.
Creating a multiboot flash drive using Easy2Boot
First you need to download a few files, we will need them when we work:
RMPrepUSB– download from here: http://www.rmprepusb.com/documents/rmprepusb-beta-versions
Easy2Boot– download from here: http://www.easy2boot.com/download/
We launch the RMPrepUSB utility and look at the interface. Lots of features and nothing. It follows from this that the method will be a little complicated for novice users, but you should not give up this option. Don't forget to plug in your flash drive.

Let's first look at those interface items that will be useful to us.
- We mark the option "Do not ask questions" - that is, no notifications with requests will appear;
- In the fields "Size" - enter MAX, "Volume Label" - set any;
- In the boot sector, select the first option associated with Windows;
- In the File system section, check the items "NTFS" and "Boot as HDD". You can also choose FAT32, but the option is slower and only supports a maximum of 4 GB file sizes.
- In the fifth section, you need to select the path to Easy2Boot. Attention! The archive does not need to be unpacked, we leave it as it is.
- Click the button "Prepare Disk". You should have a drive inserted and displayed in the topmost field, if there are several disks, then make no mistake and select the desired flash drive.
- After the preparation of the flash drive is completed (it was formatted), you need to press "Install Grub4Dos". If a warning window appears, select NO.
It is advisable not to close the utility, because it will still be useful to us. When we open the flash drive, we will see several folders there. There is an "ISO" folder, and in it are supposed folders for operating systems and some utilities.

What do we do next? You need to take the necessary images and transfer them to the WINDOWS directory, you can also move anti-virus utilities, backup programs, disk management, and RAM error checks to the appropriate folders.
Images do not have to be thrown only into the WINDOWS folder. You can drop them into the root or ISO folder. When booting from a USB flash drive, they will still be displayed.
Now you have copied the necessary files to the drive, you need to return to the main RMPrepUSB window. Open the "Drive" tab and click on the option "Make All Files on Drive Contiguous", or press Ctrl+F2.


Create a multiboot flash drive with WinInstall4Grub4DOS
From this link you can download the WinInstall4Grub4DOS tool. Unzip it and run the file. A welcome window will appear, where we click on the "Next" button.

It is very good if you have prepared the necessary images. You can select them by clicking on the "Select Folder" button, the images with the OS must be located in some folder, the name must not be with Russian letters.
After specifying the path to the system images, click "Next".


After the next click on the "Next" button, you will see operations for copying, integrating drivers and more. The process can be lengthy and we are even offered to go for tea, thanks for that.

To add data to system images, the FiraDisk script will run. In the window that appears, click OK.

The command line will automatically open, where the necessary images will be written on their own.


Now let's see what is in the folder with all the images. There appeared copies of them with the addition "FiraDisk".

Let's go to the WinInstall4Grub4DOS utility and select the "Save Files" item. In the explorer, create an additional folder and name it, for example, "Utilities", since that is where they will be written. You need to create in the folder where the folder with images is located.
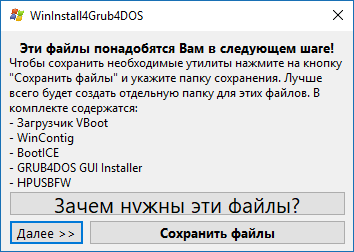
If you are interested in what these utilities are, then click on the button "Why are these files needed?".
Finally, we connect the flash drive to the PC, run as administrator HPUSBFW, located in that folder with utilities. A window will appear with a choice of flash drive, file system, preferably NTFS, and a quick format checkbox. Start the formatting process. Close the window when finished.

In the utilities folder we find the archive with the GRUB4DOS_GUI tool. Let's run this file.
We translate the checkbox to the “Disk” position and select the USB flash drive next to it. If nothing happens, then run the utility with elevated privileges. Click "Install".

A command prompt will open, press the "Enter" button there.

In the utilities folder, copy the MENU.LST and GRLDR files to the USB flash drive. If they are not, then download from the Internet, it is easy to find them. Here's a link so you don't have to search.
On the flash drive, create a folder with some name and move the images with the FiraDisk signature there. We haven't been able to create a multiboot flash drive yet, as there are a couple of steps to follow. Go!

Using Wincontig
One more moment. It is necessary to defragment the copied images. This can be done using WinContig, located in the utilities folder. Run it and select images using the "Add Files" button.

Click on the "Action" section and select the "Defragmentation" item. We are waiting for the end of the process.
The status should not be fragmented, it means something is wrong with the files, or you need to take a larger flash drive.

In the WinInstall4Grud4DOS window, click "Next", so we will find ourselves in a section where we will do something.

In the "Menu Generator for Grub4DOS" field, you need to specify the path to the disk where you have Windows images. Detailed instructions are written in a file that opens by clicking on the "What to do?" button.
After that, click "Make".

After waiting a bit, we will see the code that needs to be copied, for which there is a corresponding button. 
We have created multi-boot media with multiple operating systems. This process turned out to be long and hardly anyone will use it, but it will do for the general development.
When booting from a flash drive, the GRUB4DOS bootloader will appear, with a black background and a list of operating systems. You can work on the design of the bootloader using ZXBFM__2.1b, but this is optional.

RESULTS
So, friends. For you, I have created such a voluminous article. Now you know how to create a multiboot flash drive that has not only operating systems, but also various utilities. Some methods turned out to be simple, while others were complex or took a long time to implement. In any case, they are all effective if done correctly. Beginners may have problems, as there are a lot of pitfalls here. If there is a problem, be sure to unsubscribe in the comments, I will try to help.
We remind you that attempts to repeat the actions of the author can lead to the loss of the warranty for the equipment and even to its failure. The material is provided for informational purposes only. If you are going to reproduce the steps described below, we strongly advise you to carefully read the article to the end at least once. The editors of 3DNews are not responsible for any possible consequences.
Do you remember the wonderful discs with the name in the spirit of "Resuscitator" or "Ambulance for your PC", which could easily be found in the nearest tent selling well, very licensed software and films with music? Sometimes they really helped to quickly deal with computer problems or, at worst, find out what exactly was wrong. Sometimes, of course, the quality of these collections left much to be desired. Today, far from every computer you can find an optical drive - people have either completely gone to the Web and clouds, or use USB flash drives and external hard drives to quickly transfer data. And now they can just be used to independently create that very “ambulance kit”.
The right word, the process is quite simple - with the help of special utilities, this is done in just a couple of clicks. The main idea is simple: we combine several Live-CDs at once with various utilities or OS, write them in a special way to the drive and add a bootloader that will help start all this economy when the computer is turned on. By the way, in the same way we can create a universal flash drive with several installers for various operating systems at once. Let's look at some programs that will help us in this matter.
The easiest-to-use utility for creating multi-boot removable drives is called XBoot. You can download it on the official website or on many other mirrors, which are listed there. For the correct operation of the program, it is necessary to install the .NET Framework at least version 4. Working in XBoot is elementary - just drag the ISO images of the necessary distributions or utilities into the main program window, and it will automatically extract all the necessary information and add it to the download list. In the plate, you can edit the fields Name (name), Category (for more convenient navigation, you can scatter utilities into categories) and Help Text (a short description for each download item) at your discretion.
XBoot is “familiar” with many distributions, but sometimes it still makes mistakes or simply cannot recognize that you slipped it something like that. In this case, the utility will clarify this issue with the user. If you're trying to add a Linux distribution, for example, it's a good idea to know who its parent was. For example, Linux Mint is actually a variation of Ubuntu. In other cases, you can try selecting Grub4dos emulation for ISO, floppy or hard disk images. By the way, you can also add a Live version of Windows 7 to the USB flash drive, the creation of which we considered earlier. In WinBuilder, you must select the creation of an ISO image, and in XBoot, the item "PE, MSDART, ERD" when adding it to the boot list. But Windows installation images, starting with XP, are unlikely to work correctly. For them it is better to use utilities like Windows 7 USB/DVD download tool .


The choice of software for installation on a USB flash drive is up to you. We can recommend such utilities as the most minimal set, such as Memtest86+ and MHDD for diagnosing memory and hard disk, some kind of Live-CD with antivirus (almost every developer of antivirus solutions has such), GParted partition editor, Ultimate Boot CD and Inquisitor Live for testing hardware, as well as software for logging into the OS without a password like Kon-Boot or Offline NT Password & Registry Editor. Most of these programs are actually based on either Linux or good old DOS. So there shouldn't be any problems loading them. In XBoot, in the File → Download section, you can quickly get links to download popular applications of this type.

As soon as the set of utilities is formed, you can start creating the assembly - just click Create ISO or Create USB. In the first case, an image will be created that can be burned to disk. In the second, you will need to select a USB drive where all this stuff will be written. It is better to use the recommended syslinux as a bootloader. The speed of creating an assembly depends on the total volume of the selected utilities and the speed of the flash drive.


After everything is ready, XBoot will offer to test the assembly in the built-in QEMU virtual machine. You should not refuse - you can see how it all will look in real life, and at the same time check the performance (well, at least the ability to run) utilities.


An example of work launched in the emulator from a KolibriOS flash drive
In the future, to launch QEMU and then test the assembly, you will need to go to the tab with the appropriate name and either drag the ISO image, or select the USB drive and click the Boot button. For testing, you can also use the MobaLiveCD program, which is essentially a nice graphical shell for QEMU.


Finally, it is worth noting a couple of important nuances. First, in order to avoid compatibility issues, you must format the removable drive in the FAT32 system. The creators of XBoot recommend using the RMPrepUSB program to format large disks or flash drives. On the other hand, it is hard to imagine who would need a collection of distributions and utilities with a total volume of several tens or even hundreds of gigabytes. Secondly, even if the check of the finished flash drive in QEMU failed, still try to boot from it on a real machine. Thirdly, be careful what kind of drive you are going to work with now. Not even an hour, accidentally overwrite some data on another external HDD. In general, be careful and careful. True, then you will hardly ever need a USB “first aid kit”. Good luck!
Hello site! Tell how to create a multiboot flash drive containing several operating systems and other programs I need. I read your article and created such a flash drive, everything works, thanks, but it would be great to add additional useful software to this flash drive, for example:
Several free anti-virus disks Dr.Web® LiveCD, ESET NOD32 LiveCD, Kaspersky Rescue Disk,
Disk AntiWinLocker (removing the banner blocking the desktop)
Victoria program for fixing errors and bad blocks on the hard drive.
Acronis True Image 2014 - creating a backup of the operating system.
Acronis Disk Director - divide the hard disk into partitions.
Resuscitation disk for Windows XP - ERD Commander 5.0, resuscitation disk for Windows 7 - (MSDaRT) 7.0 and for Windows 8 (MSDaRT) 8.0.
A free Linux operating system, such as Ubuntu (Ubuntu).
So that, on occasion, I can boot a computer or laptop from such a flash drive and not only install Windows XP, Windows 7 and Windows 8, but also install the free Linux operating system, check the computer for viruses, remove the desktop blocker banner on occasion, fix bad your hard drive, repair Windows XP, Windows 7 and Windows 8.
I have a 16 GB flash drive, I think there is enough space for all this stuff! To be honest, I have never seen such multiboot flash drives, but I would very much like to have one. Regards, Mikhail.
How to create a multiboot flash drive containing several operating systems and more programs
You can create such a flash drive friends and it's not at all difficult! We will use the updated WinSetupFromUSB program using the Grub4dos bootloader capable of booting your computer or laptop from a flash drive loaded with several operating systems of various bitness (32 bit and 64 bit) and various software. Such a flash drive is very convenient and will undoubtedly come in handy for a person who is keen on a computer. After creating such a multiboot flash drive and, if necessary, deploy to another flash drive.
For me personally, such a flash drive is important and simply irreplaceable in my computer affairs.

We need a blank flash drive, as a result it will turn into a multiboot one and will contain all of the following:
Note: All operating systems and software used for the example in my article were purchased by me quite legally on the official websites of the developers. Friends, use only licensed software.
Operating systems: Windows XP, Windows 7 and Windows 8.
Dr.Web LiveCD, ESET NOD32 LiveCD, Kaspersky Rescue Disk. You can download them from the links:
Dr.Web LiveCD http://www.freedrweb.com/livecd/

ESET NOD32 LiveCD https://www.esetnod32.ru/download/utilities/livecd/

Kaspersky Rescue Disk http://www.kaspersky.ru/virus-scanner

Acronis True Image 2014 data backup. www.acronis.ru
Acronis Disk Director is a hard disk partition manager.
Resuscitation disks for Windows XP - ERD Commander 5.0, Resuscitation disk for Windows 7 - (MSDaRT) 7.0 and for Windows 8 (MSDaRT) 8.0
Free Linux operating system, such as Ubuntu (Ubuntu).
Download the Victoria program for fixing errors and bad blocks on your hard drive on my cloud storage
https://cloud.mail.ru/public/9Nbd/3W9PU9ED1

Resuscitation disk AntiWinLocker (removal of the banner blocking the desktop).
In the beginning, I suggest that you upload three operating systems to the USB flash drive, you can do this according to our article, if you do not need Windows XP, then according to another article, create a bootable Windows 7 and Windows 8 USB flash drive and only then come back here and continue.
Create a multiboot flash drive
As soon as you create a multiboot flash drive with the number of operating systems you need, then you can add other software to the flash drive.
Note: It really doesn't matter in what order you add something to the flash drive, for example, you can add programs first, and then operating systems, or vice versa. If you need a multi-boot flash drive containing only programs, then you can read directly from this place. If you wish, you can add any operating system to the flash drive at any time using the method shown below.
Select WinSetupFromUSB 1.3.exe (22 MB). Download and run the program.

If we need to create a bootable USB flash drive for Windows 7 64 bit and Windows 8 64 bit, then we run the WinSetupFromUSB_1-3_x64.exe file.

My flash drive already has three operating systems Windows XP, Windows 7 and Windows 8, a 16 GB flash drive is occupied by 7 GB, there is plenty of free space, I add programs.
Attention: if you launched the WinSetupFromUSB program for the first time and you have a clean flash drive, that is, you did not upload operating systems or any programs to it, then before working, the flash drive must be formatted in NTFS and made bootable. The name of our connected flash drive is displayed in the main window of the WinSetupFromUSB program. Put a tick on the item Auto format it with FBinst and mark the item NTFS.
Check the checkbox!

If your flash drive is already bootable and you, for example, uploaded operating systems to it using the WinSetupFromUSB program, which means we don’t mark the Auto format it with FBinst item and immediately go to the item Linux ISO/Other Grub4dos compatible ISO and click on the button on the right

an explorer window opens, in which I find my folder with images of operating systems and programs.
First of all, let's add the ESET NOD32 LiveCD antivirus disk to our multiboot flash drive,
I select it with the left mouse and click Open.


There is a short process of adding a program to our multiboot disk.


Then, in exactly the same way, we add each ISO image we have.
Let's try to boot from this bootable flash drive for fun and see the boot menu of the flash drive.
If you need to install an operating system, select the item
0 Windows NT6 (Vista/7 and above) Setup- means the installation of operating systems Windows Vista, Windows 7 and higher. Press Enter.
1 Second part/continue setup (Boot first internal disk)- boot from hard drive
As you can see, the antivirus disk from Eset NOD32 has been added to the boot menu under

In the next window, select to install the operating system that we need Windows 7 SP 1 x64 or Windows 8 x64.

Well, with programs it’s even easier, in the multiboot menu, select any program you need and press Enter. For example, you choose to download the antivirus disk from Eset NOD32 #2 eset_sysrescue from partition 0, then the antivirus program will be loaded.


To make everything more clear, let's add a few more programs to our multiboot flash drive.
Adding Dr.Web LiveCD
In the WinSetupFromUSB program, check the box Linux ISO/Other Grub4dos compatible ISO and click on the button on the right
explorer will open, select the image of the anti-virus disk Dr.Web LiveCD


The process of adding a program to our multiboot disk

The program has been moved to a multiboot flash drive.
We boot from the flash drive, we see that the Dr.Web LiveCD anti-virus disk has been added to our multiboot flash drive. Let's check his work.


Reinstalling the operating system is a fairly simple process, especially if the main tool for carrying out this operation has been prepared in advance - a bootable USB flash drive.
Today, users are offered a wide variety of utility options for creating flash drives for installing an operating system. At the same time, some utilities are clearly designed for novice users, while there are much more functional tools that are clearly designed for professionals.

Let's start with the most popular program for creating a boot drive for Windows 7 and other versions of this OS - Rufus. This utility has a simple interface, where you only need to select a USB drive and specify the ISO image of the operating system distribution, as well as support for the Russian language, the ability to check the disk for BAD blocks, and much more.
WinSetupFromUSB

This tool is an effective way to create a flash drive with any version of Windows, however, the program is clearly not designed for beginners, as evidenced by its high functionality. At the same time, it is one of the best tools for creating bootable and multi-boot media, which is absolutely free.
WinToFlash

Returning to simple utilities for creating USB drives with Windows OS, one cannot fail to mention the simple and completely free WinToFlash program. Despite the rather high functionality, the application interface is designed in such a way that the user can get to work and create a bootable USB flash drive without any questions.
WiNToBootic

An extremely simple program to create a drive with the image of Windows XP and above. The application has a minimum of settings, allowing you only to specify a removable media and an image file with an operating system distribution kit, after which the process of creating bootable media will immediately begin, which will take only a few minutes.
UNetbootin

More and more users are becoming interested in the Linux operating system: it is completely different from Windows, has many more features, and is also distributed absolutely free of charge. If you want to install Linux OS on your computer, then the UNetbootin utility will be an excellent choice. This tool has basic functionality, but at the same time allows you to download Linux distributions directly in the main window, and therefore it can be safely recommended to novice users.
Universal USB Installer

Another utility aimed at creating bootable media with a Linux distribution.
Like UNetbootin, this tool allows you to boot any Linux distribution directly from the main window (or use a previously downloaded image). In principle, the possibilities of the program end there, making it an excellent tool for those users who first decided to try the Linux OS.
Linux Live USB Creator

Unlike Unetbootin and Universal USB Installer, this application is already a much more interesting tool for creating media for installing Linux OS. In addition to the ability to download the OS distribution directly in the program window, it is worth highlighting the ability to run Linux from under Windows. To do this, not only the image of the operating system will be written to the USB flash drive, but also the files of the VirtualBox virtual machine will be loaded, allowing you to run Linux in Windows directly from the drive.
DAEMON Tools Ultra

DAEMON Tools Ultra is a popular software solution for extensive imaging. One of the features of the application is, of course, the ability to create bootable flash drives, and both Windows and Linux distributions are supported. The only caveat is that the program is paid, but with a free trial period.
PeToUSB

Returning to the topic of utilities for working with Windows OS distributions, it is worth noting the simple and completely free PeToUSB utility, which has proven itself well in working with old versions of this operating system. It is worth noting that if you are creating a bootable USB flash drive already with modern versions of Windows (starting from the 7th), then you should pay attention to alternative options, for example, WinToFlash.
Win32 Disk Imager

This tool, unlike, for example, WiNToBootic, is not only a tool for creating a drive, but also an excellent choice for creating backup copies of data and then restoring them. The only caveat of the program is that it only works with images of the IMG format, and as you know, most distributions of operating systems are distributed in the popular ISO format.
Butler

Bootler is a free solution for creating a multi-boot drive with Windows OS. Among the features of the program, it is worth highlighting a clear interface (which the WinSetupFromUSB utility cannot boast of), command management (for example, to immediately set a USB flash drive as the main boot device), as well as the ability to customize the menu design.
UltraISO

And finally, one cannot fail to mention the most popular program not only for creating bootable media, but also for working with burning discs, creating and converting images, and more - this is UltraISO. This tool has excellent functionality, but at the same time, it will allow you to easily and quickly create a USB flash drive for installing both Windows and Linux.
In conclusion. Today we reviewed the main utilities for creating bootable USB media. Each program has its own advantages and disadvantages, and therefore it is rather difficult to advise something specific. We hope that with the help of this article you were able to make your choice.
MultiBoot USB. How to create a multiboot flash drive?
Multiboot flash drive (MultiBoot USB) is designed to install operating systems Windows XP/2000/Vista/7/8
and download recovery and resuscitation images and utilities directly from a USB drive.
Utilities included in the installation package of a multiboot flash drive:
- Acronis Disk Director & True Image- Working with hard disk partitions
Symantec Ghost v11.0 - Working with hard disk partitions
Windows XPE - Mini Edition
Windows 7PE - Mini Edition
Elcomsoft System Recovery Pro v3.0 Build 466— Recovery and change of password
FreeDOS - Command line boot, includes DOS-Navigator and VC
Universal Boot Disk v3.7- Accessing NTFS partitions in MS-DOS
NT Password & Registry Editor- Changing the password and editing the registry
Active@ Boot Disk Professional v2.1- Recovery of deleted files
QuickTech Pro v5.8 - Testing and diagnostics of hardware and its components
MemTest86+ v4.20 - Testing and diagnostics of RAM
MHDD v4.6 - Testing and diagnostics of hard drives
Victoria v3.52 - Testing and maintenance of IDE and ATA HDD
HDD Regenerator v2011 - Troubleshooting (bad sectors) on HDD
Skins are located in the Boot folder. The default skins are "Moonlight" and "Rainbow". When replacing skins, copy them to the Boot folder and write the name of the new skins in the menu.lst and menu_2.lst files in the line: "gfxmenu / Boot / Moonlight".
Installation and work with the program.
To install the program on a computer, you need to run the multiboot flash drive installer - Multiboot flash drive.exe. After unpacking the SFX archive and completing the copying of the files, the program will automatically start and the selector menu will open with a set of all the necessary utilities and programs for creating a multiboot flash drive. After installing the program, two shortcuts are created: on the "Desktop" and in the "Start / All Programs / Utilities" menu.
If your computer is running Windows 7 or Windows Vista, you must run the program as an administrator.
1. Format USB flash drive.
Before you start creating a multiboot flash drive, you need to format it.
We launch the HP USB Disk Storage Format Tool utility, select the NTFS file system (preferably) or FAT32, set the checkbox to “Quick Format” and click on “Start”.

2. Installing the grub4dos bootloader on a USB flash drive.
After formatting the flash drive, we proceed to install the grub4dos bootloader. We launch the Grub4Dos Installer utility, select “Disk” in the “Device Name” window, find our USB flash drive and click on “Install”.

If everything was done correctly, then in the window that opens, an inscription with the text "The MBR / BS has been ..." will appear.
Press "Enter" and go to the next menu item.
3. Installing the Windows PE / XPE distribution kit on a USB flash drive.
ISO image of Windows XPE USB WIM using Daemon Tools, UltraISO or Alcohol utility. We launch the PeToUSB utility, below in the "Source Path To Built BartPE / WinPE Files" field we indicate the path to our virtual disk. Set the checkbox only in the "Enable File Copy" window and click "Start".

4.1. Installing the Windows XP distribution kit on a USB flash drive.
We mount the iso image of Windows XP on a virtual disk using the Daemon Tools, UltraISO or Alcohol utility. We launch the WinSetupFromUSB utility, check the box in the "Windows 2000/XP/2003 Setup" window, specify the path to our virtual disk and press "GO".

4.2. Installing the Windows 7 distribution kit on a USB flash drive.
We mount the iso image of Windows 7 on a virtual disk using the Daemon Tools, UltraISO or Alcohol utility. We launch the WinSetupFromUSB utility, set the checkbox in the "Vista / 7 / Server 2008 - Setup / PE / RecoveryISO" window, specify the path to our virtual disk and click "GO".

5. Copying files and utilities to a USB flash drive.
Through the "Browse ..." button, specify the path to the flash drive and click "Extract". To the question: "Do you want to replace an existing file?" press "Yes".

After the files are copied to the USB flash drive, it can be tested and checked for performance.
Attention!!! Implementation of points 1; 2 and 5 are a must!
Any of paragraph 3; 4.1 and 4.2, if you do not need it, you can skip it.
Testing a multiboot flash drive.
To test and see what we got, we launch the WinSetupFromUSB utility from the selector menu, set the checkbox in the “Test in QEMU” window, press “GO” and enjoy

If everything went well, then the interface of the bootable flash drive will look like this:

Distributions for a bootable flash drive: https://yadi.sk/d/6nBtL8wDuW9ek
I hope this article helped you.
In contact with
Read also...